As the air turns crisp and you reach for your coziest sweater, your makeup routine often needs a little refresh. The heavy powders of summer can start to look dry as the weather cools down, leaving your skin wanting a touch more hydration and glow.

This is where the magic of cream blush comes in. These velvety, easy-to-blend formulas melt into the skin, creating a natural flush that looks like it’s coming from within. They give a healthy, dewy finish that perfectly complements the soft light of autumn.
Forget harsh lines or cakey textures. We’ve gathered 38 of the most beautiful cream blushes to help you achieve that sought-after fall glow. With simple, step-by-step instructions for each one, you’ll find it’s easier than ever to get a fresh, radiant look.
1. Glossier Cloud Paint in Dawn

This blush brings a touch of sunshine to your cheeks. The warm, orangey-coral shade looks like a pretty sunset. It feels very light and pillowy to the touch. The color goes on sheer at first, so you can build it up for more pop.
It melts right into the skin. You get a soft, natural-looking flush without any harsh lines. The finish is dewy and fresh, making your skin look healthy and bright. It’s a wonderful choice for bringing warmth to your complexion as the weather cools down.
DIY Application Steps:
- Get Ready: Start with a clean, happy face. You can put on your foundation first if you use it, or just go with your bare skin.
- A Tiny Squeeze: Gently squeeze the little tube. You only need a super small dot of color, about the size of a ladybug, on your fingertip. A little goes a long way!
- Find Your Cheeks: Look in the mirror and give a big, cheesy smile. See those round parts that pop up? Those are the apples of your cheeks. That’s your target!
- Dot, Dot, Dot: Gently tap three little dots of the blush onto the apple of one cheek.
- Pat and Blend: Using your clean fingers, gently pat and tap the dots to blend them into your skin. Move your fingers in little circles up towards your temples. Keep patting until it looks soft and natural, like you just came in from playing outside. Repeat on the other side!
2. Stila Convertible Color Lip & Cheek Cream

This little pot holds a lovely, classic rose color. It feels creamy and smooth between your fingers. The texture is rich but not heavy, allowing it to blend beautifully on the skin. You can easily go from a soft whisper of color to a more noticeable, rosy glow.
It gives a satin finish that looks like real skin. This multi-tasker is great for adding a coordinated touch to both lips and cheeks. The color offers a timeless elegance for a polished look.
DIY Application Steps:
- Prep Your Skin: Make sure your face is clean and moisturized. You can apply this over foundation or on bare skin.
- Warm It Up: Swirl your clean fingertip gently in the little pot. The warmth from your finger will soften the cream just enough.
- Smile Big: Grin at yourself in the mirror to find the fullest part of your cheeks.
- Tap it On: Lightly tap your finger with the blush on the apples of your cheeks. Start with a few gentle taps.
- Blend with Taps: Use a clean finger to tap and press the color into your skin. Blend the edges outwards and upwards. Keep tapping, don’t rub, for a seamless finish. Add a little more if you want a stronger color.
3. Elysian Glow Petal Touch Blush

This blush has a beautiful whipped texture. The soft pink color in the compact looks inviting and delicate. It feels bouncy and light, almost like a soft mousse. The formula is designed to give you a luminous glow from within.
Once on the skin, it delivers a sheer wash of color with a subtle shimmer. The effect is a healthy radiance that catches the light nicely. It’s a superb option for days when you want your skin to look extra fresh and vibrant.
DIY Application Steps:
- A Clean Canvas: Begin with your usual clean face. This blush works well on its own or over a skin tint.
- Gentle Swirl: Using your middle finger, gently press and swirl into the bouncy blush. Pick up a small amount of the product.
- Smile and Dot: Make a big smile. Place a small dot of the blush right on the center of the apple of each cheek.
- Pat in a Circle: With your finger, gently pat the blush in a small circular motion. This helps to blend it right on the apple of your cheek for a cute, flushed look.
- Check Your Glow: Look at your face in the light. If you want a little more color, add another tiny dot and pat some more.
4. NARS The Multiple in Orgasm

This iconic stick is a versatile tool for your makeup bag. The peachy-pink shade is famous for its hint of golden shimmer. It glides on smoothly, feeling creamy and lightweight. It’s made to be used on eyes, cheeks, lips, and even your body.
The color gives a universally flattering glow that awakens the complexion. It creates a luminous sheen that looks radiant in any light. The convenience of the stick form makes it a simple choice for a quick touch of color on the go.
DIY Application Steps:
- Twist Up: Twist the bottom of the stick just a little bit so a small amount of the blush is showing.
- Draw a Line: Smile slightly. Gently draw one short line of the blush stick from the apple of your cheek up towards your hairline.
- Warm Your Fingers: Rub your ring and middle fingers together for a second to warm them up.
- Tap and Melt: Use your warm fingers to tap, tap, tap along the line you drew. The warmth helps the blush melt into your skin.
- Blend the Edges: Keep tapping to soften the edges so there are no hard lines. It should look like a natural glow. Repeat on the other side.
5. Huda Beauty Cheeky Tint Blush Stick

This blush stick delivers a big splash of color. The bright pink shade is playful and energetic. It has a very creamy feel and glides onto the skin without any pulling. The formula is buildable, letting you decide if you want a subtle tint or a bold statement.
It leaves a dewy, juicy finish on the cheeks. Your skin will look plump and hydrated. This is a fun option when you want your cheeks to be the star of the show.
DIY Application Steps:
- Ready, Set, Go: Have your clean face ready for some color.
- Swipe Up: Take the cap off the stick. Place the blush at the roundest part of your cheek. Make one gentle swipe upwards, following your cheekbone.
- Use a Brush or Sponge (Optional): For this blush, a dense brush or a makeup sponge works great. You can also use your fingers.
- Stipple and Blend: Quickly start dabbing the blush with your tool or fingers. Use a quick up-and-down motion, like you’re stamping, to blend the color.
- Soften the Look: Make sure the color is blended well at the edges. You want a beautiful flush, not a stripe. Do the same on your other cheek.
6. Wander Beauty Double Date Lip and Cheek

Here is a smart, two-in-one product. The rosy hue is soft and very wearable for every day. The texture is a balmy cream that feels nourishing on the skin. It’s designed to give a sheer, believable tint of color.
This product creates a moisturized, fresh look. The color is subtle, making it a reliable choice for a “no-makeup” makeup day. It’s small and easy to carry for touch-ups.
DIY Application Steps:
- Twist and Open: Take the cap off to reveal the blush stick.
- Apply with Fingers: It’s best to use your fingers for this one. Dab your ring finger onto the tip of the blush.
- Press, Don’t Rub: Smile to find your cheek apples. Gently press your blush-covered finger onto your cheeks.
- Keep Pressing: Continue to press the color in with your fingertip. This melts the balm into your skin for a very natural look.
- Add a Little to Lips: Use your finger to press a little of the same color onto your lips for a pretty, matching look.
7. Victoria Beckham Beauty Blush Divine

This is a very chic and elegant blush. The beautiful rose shade looks sophisticated in its stylish compact. It has a velvety cream formula that feels soft and blends with ease. A little goes a long way with this pigmented product.
It sets to a soft-matte finish on the skin. This gives a refined and polished flush of color that lasts throughout the day. This is a superb blush for creating a grown-up, elegant makeup look.
DIY Application Steps:
- Open the Compact: Gently open the pretty tortoise-shell case.
- Use Two Fingers: Press your index and middle fingers together into the cream blush.
- Find Your Cheekbones: Instead of the apples, find the bone that runs from your ear towards your mouth. This is your cheekbone.
- Pat Upwards: Start tapping your fingers with the blush just above your cheekbone. Keep tapping in an upward and outward line.
- Build Slowly: This blush has a lot of color, so start with a little. You can always add a second light layer if you want more.
8. NARS Air Matte Blush

This blush has a unique, airy texture. The soft pink color looks muted and natural. It feels like a lightweight putty that transforms into a soft powder feel on the skin. It’s designed to diffuse color for a soft-focus effect.
The finish is a modern matte that does not look flat or dry. It gives the cheeks a blurred, smooth appearance. This is a great choice for those who prefer a blush that isn’t shiny.
DIY Application Steps:
- A Clean Start: As always, start with a clean face. This blush works well over foundation.
- Swirl a Brush: Take a fluffy but dense makeup brush and swirl it in the pot to pick up the blush.
- Tap Off Extra: Gently tap the handle of the brush on the side of the pot. This gets rid of any extra product so you don’t apply too much at once.
- Buff in Circles: Smile, and then gently press and move the brush in little circles on your cheeks.
- Build the Color: Keep swirling in soft circles to blend. If you want more color, just swirl your brush in the pot again and repeat the steps.
9. Merit Flush Balm Cream Blush

This stick blush offers a transparent veil of color. The beige-toned shade is subtle and sophisticated. It has a balmy, slick texture that glides over the skin, leaving a healthy-looking sheen. You can’t mess this one up.
It provides a dewy, glowing finish that looks like you just had a great facial. The color is very sheer, making it a fine choice for people who are new to blush or like a minimal look.
DIY Application Steps:
- Twist It Up: Twist up the dome-shaped blush stick.
- Direct Swipe: You can apply this one directly to your face. Give a little smile and swipe the dome once or twice over your cheekbones.
- Pat with Your Palm: For a super natural blend, open your hand and use the fleshy part of your palm under your thumb. Gently press and pat your cheek to blend the blush.
- Fingers Work Too: You can also just use your fingertips to tap and blend the color if you prefer.
- Add More if You Like: The color is very light, so feel free to swipe and blend another layer if you want more of a glow.
10. Glossier Cloud Paint in Puff

This is a classic, light pink color. It looks like the soft, cool pink of a ballet slipper. The formula is a gel-cream that feels weightless and blends into the skin without effort. It is easy to build the color from a whisper to a happy pop.
It gives a natural, lit-from-within glow that mimics a real flush. This shade is wonderful for fair skin tones or for anyone wanting a delicate, youthful touch of color.
DIY Application Steps:
- Just a Dot: Squeeze the tube very, very gently. You only need the tiniest dot for each cheek.
- Dot on Cheeks: Place one or two small dots high on your cheekbones.
- Use Your Fingers: Take your ring and middle fingers and begin tapping.
- Tap, Tap, Tap: Gently tap the dots to spread the color out. Blend it up and back towards your hairline. The tapping motion gives the softest look.
- Check in the Mirror: Make sure both cheeks have the same amount of soft, pretty color. Add another tiny dot if needed.
11. Stila Heaven’s Hue Highlighter in Peony

This blush has a fun, putty-like feel. The bright, cool pink color is vibrant and eye-catching. When you press it, the texture is bouncy and soft, molding under your finger. It’s a special formula that goes from a cream to a powder once it’s on your skin.
It gives a radiant finish with a very fine shimmer. The glow is noticeable but doesn’t have large glitter particles. This is a brilliant product for adding a pop of color and light to your cheeks at the same time.
DIY Application Steps:
- Clean Face First: Make sure your skin is ready.
- Press and Swirl: Take your finger and press it into the bouncy blush. Give it a little swirl to pick up some color.
- Find Your High Points: Instead of the apple, find the highest point of your cheekbone, closer to your eye.
- Tap and Pat: Gently tap the color onto that high point. Pat it out to blend. You want the color to be most visible where the light would naturally hit your face.
- Build if Needed: This blush is also a highlighter, so start with a little. You can add another layer for a more intense glow.
12. Tower 28 Beauty BeachPlease Lip + Cheek Cream Blush

This blush gives a true sun-kissed look. The warm rosy pink shade looks like you just spent a happy day at the beach. Its formula is creamy and very easy to blend. It contains skin-friendly ingredients that help soothe your skin.
You get a luminous, natural finish. It leaves a healthy glow that is never greasy or sticky. It is a fantastic option for sensitive skin types who want a carefree wash of color.
DIY Application Steps:
- Start Clean: Begin with your clean, moisturized face.
- Swirl and Warm: Swirl your fingertip in the pan to warm up the cream.
- Smile and Find the Spot: Make a big smile in the mirror to find the apples of your cheeks.
- Tap in a ‘C’ Shape: Start tapping the color on your cheek apples. Then, continue tapping up towards your temple in a soft “C” shape.
- Press to Blend: Gently press the color into your skin with a clean finger or a makeup sponge. This will give a seamless, “I woke up like this” look.
13. Charlotte Tilbury Glowgasm Light Wand

This product is all about the glow. The shimmery pink liquid is full of light-reflecting pearls. It comes in a tube with a soft cushion applicator on the end. The texture is a lightweight gel that is easy to dot onto the skin.
It delivers a high-shine, magical glow. Your cheeks will look dewy and almost wet with radiance. This is the one to reach for when you want to make a dazzling entrance.
DIY Application Steps:
- Unlock the Magic: Twist the applicator tip to the “on” position.
- A Gentle Squeeze: Squeeze the tube very gently until you see a tiny bit of product on the cushion. Twist it back to “off” so no more comes out.
- Dot, Don’t Swipe: Lightly dot the cushion tip two or three times along the top of your cheekbones.
- Blend Quickly: Using your fingers, quickly and gently tap to blend the dots. Work fast, as it sets quickly.
- Glow All Over: You can also add a tiny dot to the tip of your nose and your brow bone for an all-over fairy glow.
14. Kosas Color & Light: Cream Blush & Highlighter Duo

This is a versatile palette for a sculpted glow. The compact holds two different products: a rich cream blush and a coordinating highlighter. The blush has a smooth, blendable texture, and the highlighter feels like a soft balm. They are made to work together.
The blush gives a beautiful, skin-like finish while the highlighter adds a dewy radiance. It’s a great all-in-one for creating dimension and a healthy complexion. You can use them separately or layer them.
DIY Application Steps:
- Fingers for Blush: Let’s use fingers for the blush. Swirl your fingertip in the blush color (the darker side).
- Pat on Cheeks: Smile and pat the color onto the apples of your cheeks, blending it slightly back.
- Fingers for Highlight: Now, use a clean finger to pick up some highlighter (the shiny side).
- Tap on High Points: Tap the highlighter on the very top of your cheekbones, just above the blush. You can also add a little under your eyebrows.
- Melt Together: Use your finger to gently tap where the blush and highlighter meet so they blend together for a soft, glowing look.
15. Auric Glaze Veil Cream Blush

This blush offers a delicate and refined color. The soft peachy-pink shade in the pan has a subtle shimmer running through it. The texture is a firm cream that picks up easily on a brush or finger, melting into the skin upon application.
It leaves behind a glassy, luminous sheen. The finish is very sophisticated, making the skin look healthy and polished. This is a beautiful choice for an elegant event or for everyday wear.
DIY Application Steps:
- A Fluffy Brush is Nice: For this blush, a small, fluffy makeup brush works wonderfully. You can also use your fingers.
- Swirl the Brush: Gently swirl your brush into the pan to pick up a light layer of the blush.
- Sweep Upwards: Smile softly. Starting from the apple of your cheek, use the brush to sweep the color upwards towards your hairline.
- Use Light Strokes: Imagine you are using a feather. Use very light, sweeping motions.
- Build the Glow: The color is soft. If you want more, just do another light sweep over the same area.
16. Solstice Skin Day Gleam Balm

This stick is like sunshine in a tube. The beautiful golden color is all about warmth and light. It’s a balm, so it feels very smooth and moisturizing as it glides on. It’s filled with fine shimmers that catch the light.
It gives a dewy, sunlit glow to the skin. This isn’t a traditional blush, but it can be used to add warmth and a bronze flush to the cheeks. It’s for days when you want to look like you’ve been vacationing.
DIY Application Steps:
- Warm It Up: You can swipe the stick on the back of your hand first to warm up the balm.
- Apply to High Points: Gently swipe the stick directly onto the high points of your face where the sun would hit: top of the cheekbones, brow bone, and the bridge of your nose.
- Use Your Fingers: With clean fingers, gently tap and press to blend the balm into your skin.
- Don’t Rub: Tapping and pressing will keep the pretty glow in place. Rubbing can make it disappear.
- A Sunny Look: This gives a warm glow rather than a pink flush. It’s a beautiful, natural look.
17. Kosas Color Haze Multi-Use Pigment

This is a unique, mousse-like pigment. The warm, earthy terracotta shade is very on-trend for fall. It comes in a little pot with a doe-foot applicator, like a lip gloss. The texture is whipped and airy, but it is packed with color.
It dries down to a comfortable, long-wearing matte finish. A tiny bit is all you need for a bold wash of color on cheeks or lips. This is a strong choice for those who love warm, monochromatic makeup looks.
DIY Application Steps:
- One Dot is Enough: This is very pigmented! Take the applicator out and place just ONE tiny dot on your cheek.
- Work Fast: This product dries down, so you need to blend it right away.
- Use a Brush or Sponge: A dense brush or a damp makeup sponge is best for blending this. You can use fingers if you’re quick.
- Stipple, Don’t Swipe: Quickly dab your brush or sponge over the dot in a fast tapping motion to spread and blend the color out.
- Build if You Dare: Once the first layer is dry, you can add another tiny dot if you want even more color. Repeat on the other cheek.
18. Milani Cheek Kiss Cream Blush

This blush has a rich and creamy texture. The rosy coral color is cheerful and brightens the face. It feels very smooth in the pot and applies to the skin with a satisfying glide. The formula is easy to work with and blends out without much effort.
It gives a natural, slightly dewy finish. The color is buildable, so you can go from a sheer hint to a more vibrant cheek. This is a solid, user-friendly blush for all skill levels.
DIY Application Steps:
- Clean Fingers are Key: Make sure your hands are clean.
- Swirl and Pick Up: Gently swirl your middle finger in the pot a couple of times to get some blush on your fingertip.
- Find the Apples: Grin in the mirror! Dot the blush right on the roundest part of your cheeks.
- Pat to Blend: Gently pat your finger on the dots. Move your finger in little circles, blending the color outwards.
- Check for Evenness: Make sure both cheeks look the same. Add another thin layer if you want the color to be brighter.
19. Rare Beauty Stay Vulnerable Melting Cream Blush

This blush has an innovative formula. The muted, dusty rose color is very modern and chic. It looks like a cream but magically transforms into a liquid-like texture upon contact with your skin, making it very easy to blend.
It leaves a satin, skin-like finish that looks completely natural. It feels like you’re wearing nothing at all. This is a wonderful option for a sophisticated, barely-there flush.
DIY Application Steps:
- Tap, Don’t Swirl: This blush is unique. Just tap your finger into the pan two or three times. Don’t swirl or you’ll pick up too much.
- Transfer to Cheeks: Gently tap your blush-covered finger onto your cheeks.
- Keep Tapping: Continue tapping with your finger or a dense brush to blend. You will feel the cream “melt” into your skin.
- It Blends Itself: This formula is very forgiving and almost blends itself out. Just keep tapping until the edges are soft.
- A Natural Finish: The result is a very soft, natural flush that looks like it is coming from your skin itself.
20. Sisley Phyto-Blush Twist

This is a fun and functional blush stick. The bright coral color is swirled with a luminous highlighter. The zebra-stripe pattern looks cool, but it also means every application gives you both color and glow. It glides on like a cream and sets like a powder.
The finish is radiant and long-lasting. It gives the cheeks a healthy sheen and a pop of vibrant color. The stick format makes it easy to apply precisely without any tools.
DIY Application Steps:
- Twist It Up: Twist the bottom of the stick to reveal the fun, stripy blush.
- One Swipe: For a soft look, just make one swipe of the stick on the apple of your cheek.
- Circles with Fingers: Use your fingers to blend the blush. Rub in gentle circles to mix the blush and highlighter stripes together on your skin.
- For More Color: If you want a brighter look, you can draw a little “X” with the stick on your cheek and then blend it out.
- A Quick Glow: This is a super fast way to get color and a glow on your cheeks in just a few seconds.
21. Fenty Beauty Cheeks Out Freestyle Cream Blush

This blush is modern and fresh. The palette shows two vibrant pinks, one lighter and one bolder. The formula is designed to be sheer and buildable, so you can control the intensity. It feels lightweight and non-greasy to the touch.
It melts into the skin for a natural-looking wash of color. The finish is smooth and resists sweat and water. This is a superb blush for a long-lasting, fresh-faced look that you can customize by mixing the shades.
DIY Application Steps:
- Choose Your Shade: You can use one color or swirl your finger over both to mix them.
- Warm on Fingers: Use your ring finger to pick up some of the cream blush.
- Smile and Tap: Give a big smile and tap the color onto the apples of your cheeks.
- Blend Upwards: Continue tapping to blend the color up along your cheekbones towards your temples.
- Add for More Pop: The color is sheer, so you can easily add another layer for a more vibrant look without it getting cakey.
22. e.l.f. Monochromatic Multi Stick

This is a hard-working, do-it-all stick. The warm, brownish-nude color is very versatile. The texture is a cream-to-powder formula that glides on smoothly and feels weightless. You can use this on your eyes, lips, and cheeks for a cohesive look.
It delivers a soft, blendable wash of color. The finish has a subtle shimmer for a lit-from-within glow. For a quick and easy makeup routine, this multi-stick is a genuine hero.
DIY Application Steps:
- Twist Up the Stick: Twist the bottom so just a little bit of the product is showing.
- Swipe on Cheeks: Swipe the stick directly onto your cheekbones. One or two swipes is a good start.
- Use a Brush to Blend: A dense, fluffy brush is great for this. Use the brush to buff the color into your skin using small, circular motions.
- Fingers Work Too: If you don’t have a brush, you can use your fingers to tap and blend the color.
- Add to Eyes and Lips: Swipe a little on your eyelids and press it onto your lips to tie your whole look together.
23. Saie Dew Blush Liquid Cheek Blush

This blush gives a lovely, watery tint. The bright, cheerful coral-pink color looks very fresh. It’s a liquid formula that comes with a doe-foot applicator for easy dotting. It is a very lightweight and buildable blush, full of skin-loving ingredients.
It provides a dewy, glowing-from-within finish. The color melts into the skin for a very natural and healthy appearance. This is a wonderful choice for those who love a dewy, fresh-faced makeup style.
DIY Application Steps:
- A Little Goes Far: This is a liquid, so be careful. Take the wand out and use the applicator to place just one or two small dots on each cheek.
- Blend Right Away: Use your fingers or a damp sponge to start blending immediately.
- Tap, Don’t Rub: Gently tap over the dots to spread the color. Rubbing can make it patchy.
- Build Slowly: If you want more color, add one more dot at a time and blend it out before adding more.
- A Dewy Finish: This will leave a pretty, dewy sheen on your cheeks that looks like healthy skin.
24. Verdant Beauty Velvet Touch Cream Blush

This blush comes in a luxurious-looking pot. The deep, rosy-brown color is rich and elegant. The texture appears thick and velvety in the jar. It is a highly pigmented formula that is designed to blend out to a soft, diffused finish.
It sets to a soft-focus, velvet-matte look. This helps to smooth the appearance of the skin. It’s a fine choice for creating a sculpted and sophisticated cheek look.
DIY Application Steps:
- Use a Light Hand: This blush is very pigmented. You only need a tiny amount.
- A Brush is Best: Use a small, dense makeup brush. Lightly tap the brush into the pot.
- Tap Off the Extra: Tap the brush handle against the pot to remove any excess product.
- Stipple on Cheeks: Instead of smiling, find the hollows of your cheeks. Gently stipple (tap) the color in that area, blending upwards onto the cheekbone.
- Buff to Soften: Use clean, circular motions with the brush to soften the edges for a beautifully sculpted look.
25. Bobbi Brown Pot Rouge for Lips & Cheeks

This is a classic and beloved product. The soft, neutral pink is a go-to color that looks good on many people. It comes in a sleek, mirrored compact. The formula is a creamy balm that feels comfortable and gives a sheer tint.
It delivers a subtle, natural-looking flush. The finish is slightly dewy and makes skin look healthy and fresh. This is a dependable choice for an easy, everyday look.
DIY Application Steps:
- Warm it Up: Press your finger into the pan and swirl it around a little to warm up the cream.
- Smile and Pat: Smile to find the apples of your cheeks and pat the color on with your finger.
- Press and Melt: Use the pad of your finger to gently press the color into the skin. This helps it melt in for a very natural look.
- A Little on the Nose: For a cute, youthful look, you can pat a tiny bit of what’s left on your finger across the bridge of your nose.
- Don’t Forget Lips: Press the color onto your lips for a pretty, matching stain.
26. e.l.f. Superdewy Liquid Blush

This product is all about a wet-look glow. The peachy-pink color is fresh and youthful. It’s a liquid formula with a wand applicator, designed for easy application. It is very pigmented and can be built up for a strong pop of color.
It gives a super dewy, almost glossy finish. If you love the look of gleaming, hydrated skin, this is the blush for you. It’s a fun, affordable way to try the dewy trend.
DIY Application Steps:
- Shake it Up: Give the tube a little shake before you open it.
- One Tiny Dot: This is very colorful! Use the applicator to put just one tiny dot on the high part of your cheekbone.
- Blend with a Sponge: A damp makeup sponge will give the best, most natural blend.
- Pounce and Blend: Gently pounce the sponge over the dot to spread it and blend it into your skin.
- Work Quickly: This blush can set fast, so be ready to blend as soon as you apply the dot.
27. Westman Atelier Lit Up Highlight Stick

This stick provides a glassy, sophisticated sheen. The color is a translucent pearly white. It has a unique gel-like texture that glides on smoothly without feeling sticky. It’s designed to give an authentic, dewy glow rather than a glittery sparkle.
It creates a luminous, wet-skin finish. This is not a blush, but a highlighter that can be used over blush or on its own for a fresh look. It is an excellent choice for a chic, editorial-style glow.
DIY Application Steps:
- Apply After Blush: You can use this over your favorite cream blush or on its own.
- Swipe on High Points: Gently swipe the stick along the very top of your cheekbones.
- Tap with Ring Finger: Use your ring finger (it’s the gentlest!) to tap and melt the product into your skin.
- Other Glowy Spots: You can also swipe a little down the bridge of your nose, on your cupid’s bow (the little dip above your top lip), and in the inner corners of your eyes.
- A Glassy Look: This gives you a beautiful, glassy glow that looks very natural and healthy.
28. Patrick Ta Major Headlines Double-Take Creme & Powder Blush Duo

This is a clever blush duo for ultimate staying power. The compact features a cream blush and a matching powder blush. The rosy pink shades are designed to be layered. The cream has a smooth texture, and the powder is very finely milled.
The unique application method gives a dimensional, long-lasting finish. This duo is a superb choice for important events or long days when you need your blush to look fresh for hours.
DIY Application Steps:
- Powder First: This is different! First, take a fluffy brush and apply the POWDER blush to the apples of your cheeks.
- Then Apply Cream: Now, take a damp makeup sponge or your fingers and tap the CREAM blush on top of the powder.
- Press and Blend: Gently press the cream in. This makes the powder underneath look like it’s glowing from within.
- A Unique Glow: This technique gives a beautiful, long-lasting finish that won’t fade away.
- Trust the Process: It might seem backward, but applying the cream on top gives a stunning, dimensional look.
29. Westman Atelier Baby Cheeks Blush Stick

This blush stick provides a luxurious touch of color. The dusty rose shade is natural and very flattering. It has a creamy, balmy texture that feels nourishing on the skin. The formula is loaded with ingredients that help to soothe and hydrate.
It leaves a natural, dewy finish that looks like a real flush. The color is easy to blend and build. This is a wonderful choice for a quick, foolproof application that results in a healthy, radiant complexion.
DIY Application Steps:
- Smile and Swipe: Give a little smile and swipe the stick directly onto the apples of your cheeks.
- Use Your Fingers: The warmth of your fingers is great for blending this blush.
- Tap in Circles: Use your middle and ring fingers to gently tap the blush and blend it out in soft circles.
- A Little on the Lips: You can also tap a little of the color onto your lips for a pretty, natural tint.
- A Healthy Flush: The result is a beautiful, healthy-looking flush that makes you look happy and well-rested.
30. Rare Beauty Positive Light Liquid Luminizer

This is a liquid highlighter for a powerful glow. The champagne-gold shade is bright and reflective. It comes in a bottle with a doe-foot applicator, making it easy to apply precisely. The formula is very thin and lightweight, filled with fine pearl particles.
It delivers a silky, second-skin finish that catches the light beautifully. You can build it from a soft sheen to a striking highlight. This is a fantastic choice for anyone who loves a strong, luminous cheek glow.
DIY Application Steps:
- Shake Well: Always give the bottle a good shake before you use it.
- One Dot is Plenty: Use the applicator to place one or two small dots on the high points of your cheekbones.
- Blend with Fingertip: Use your fingertip or a small brush to gently tap and blend the luminizer.
- A Little Goes a Long Way: This is very concentrated, so start with a small amount and add more if you need it.
- Mix with Foundation: For an all-over glow, you can mix one small drop into your foundation or moisturizer.
31. Rare Beauty Soft Pinch Liquid Blush

This liquid blush is famous for its powerful pigment. The rosy-nude color is incredibly versatile and popular. It comes in a tube with a doe-foot applicator and is available in both matte and dewy finishes. The formula is a weightless liquid that blends beautifully.
A single dot is enough for both cheeks, so a bottle lasts a very long time. It creates a soft, healthy-looking flush that stays put all day. This is a top-tier choice for anyone wanting a high-impact, long-wearing cheek color.
DIY Application Steps:
- Be Careful!: This blush is SUPER pigmented. You only need one tiny dot.
- Dot on Hand First: Put one dot on the back of your hand. This helps you control how much you use.
- Pick Up with Finger: Use your finger to pick up a little bit of the blush from your hand.
- Tap on Cheeks: Gently tap the color onto the apples of your cheeks.
- Blend, Blend, Blend: Quickly blend it out with your fingers or a damp sponge. Keep tapping until it looks soft and seamless.
32. Laura Mercier Crème Cheek Colour

This blush offers an elegant and subtle glow. The soft, rosy pink color gives a classic, pretty flush. Housed in a sleek compact, its cream formula has a cushiony, lightweight feel. The texture is designed to be buildable and easy to work with.
It provides a silky, translucent wash of color. The finish is a natural satin, making your skin look healthy and vibrant. This is a wonderful selection for a refined, timeless cheek color that never looks overdone.
DIY Application Steps:
- Use a Brush or Fingers: This works well with either a small, dense brush or your fingertips.
- Swirl Gently: Swirl your brush or finger in the compact to pick up the color.
- Smile and Apply: Smile softly to find your cheeks. If using a brush, use light, sweeping motions. If using fingers, tap gently.
- Buff the Edges: Use your brush or a clean finger to soften the edges of the blush so there are no harsh lines.
- Build as Needed: The color is buildable. If you want more, just add another light layer.
33. bareMinerals Bounce & Blur Blush

This blush has a very unique, playful texture. The peachy-pink color is soft and universally flattering. It is a cream-powder hybrid with a bouncy, putty-like feel in the pan. The formula is made to be mistake-proof and easy to apply with just your fingers.
It creates a blurred, soft-focus finish on the skin. This helps to diffuse light and smooth the look of your cheeks. It’s a great choice for a quick, natural-looking flush on the go.
DIY Application Steps:
- Get Bouncy: Press your finger into the blush. Feel how it has a little bounce to it!
- Pick Up Color: Swirl your fingertip around to pick up some of the blush.
- Pat on Cheeks: Smile and gently pat the color onto the apples of your cheeks.
- Keep Patting: Use a gentle patting motion to blend the color. Don’t rub, as tapping gives a softer look.
- A Blurred Look: The blush will look soft and blurry, not like a streak of color. It’s a very natural finish.
34. Aether Cosmetics Anywhere Creme Multistick

This is an earthy and elegant multi-use stick. The warm terracotta shade is wonderful for fall. The formula is a nourishing cream that glides smoothly wherever you put it. It’s designed to be used on cheeks, lips, and even as an eyeshadow.
It provides a radiant, satin finish. The color is buildable from a sheer tint to a more opaque look. This is a fantastic product for creating a warm, cohesive makeup look with just one item.
DIY Application Steps:
- Warm the Stick: You can warm the tip on the back of your hand to make it extra creamy.
- Swipe on Features: Gently swipe the stick once on your cheekbones, across your eyelids, and onto your lips.
- Use One Finger to Blend: Pick one clean finger to do all the blending.
- Tap and Melt: Gently tap and press the color on your cheeks until it’s blended. Do the same on your eyelids.
- Press on Lips: For your lips, just press them together a few times to blend the color evenly.
35. Freck Beauty CHEEKSLIME Lip + Cheek Tint

This product is a vibrant and long-lasting tint. The bold, berry-red color makes a statement. It’s a liquid-gel formula that comes in a tube with a slanted applicator, similar to a lip gloss. This tint is made to give a flush that looks like it’s coming from under your skin.
It absorbs quickly and leaves behind a beautiful, lasting stain. The finish is natural and skin-like. This is a superb option if you want your blush to last all day without fading or moving.
DIY Application Steps:
- Work One Cheek at a Time: This is a stain, so you have to work fast!
- Draw a Tiny Stripe: Use the applicator to draw one very small stripe on your cheek.
- Blend Immediately!: Use your fingers to quickly tap and blend the color out before it dries and sets.
- Add More if You’re Brave: Once the first layer is blended, you can add another small stripe for more color.
- A Lasting Stain: This will leave a pretty stain on your skin that won’t budge.
36. RMS Beauty Lip2Cheek

This is a cult-favorite from the world of clean beauty. The deep, rosy-brown shade is sophisticated and earthy. It comes in a simple glass pot, and the formula is rich with nourishing oils like coconut oil. The texture is a dense, concentrated cream.
It gives a dewy, youthful glow to the skin. The color is sheer but buildable and offers a beautiful, hydrated finish. This is a wonderful choice for those with dry skin or who love an ultra-dewy look.
DIY Application Steps:
- Clean Fingers Only: Because it’s in a pot, always use clean fingers.
- Warm It Up: Swirl your ring finger in the pot. The heat from your skin will warm the oils and make the blush creamier.
- Press into Skin: Instead of rubbing, gently press the color onto your cheeks and your lips.
- Keep Pressing: Continue to use a pressing motion to blend. This helps the product melt into your skin for a seamless look.
- A Healthy Sheen: The result is a healthy, slightly shiny flush that looks very natural.
37. Charlotte Tilbury Matte Beauty Blush Wand

This is the matte cousin to the famous glow wand. The dusty rose color is elegant and looks beautiful on many skin tones. It uses the same cushion applicator for a simple, dot-and-blend application. The liquid-cream formula is lightweight and easy to manage.
It dries down to a soft-focus, natural matte finish. This is not a flat matte; it just looks like real skin without any shine. It’s a superb choice for a sophisticated, long-wearing flush of color.
DIY Application Steps:
- Twist to Open: Twist the top of the wand to the “on” position.
- Squeeze Gently: Give the tube a very gentle squeeze until a small dot of blush appears on the cushion. Twist it back to “off.”
- Dot on Cheeks: Place one or two dots high on your cheekbones.
- Buff to Blend: Use a dense brush or your fingers to gently buff and tap the dots. Blend upwards and outwards.
- A Soft-Focus Finish: The blush will dry down to a beautiful soft, matte finish that looks very smooth.
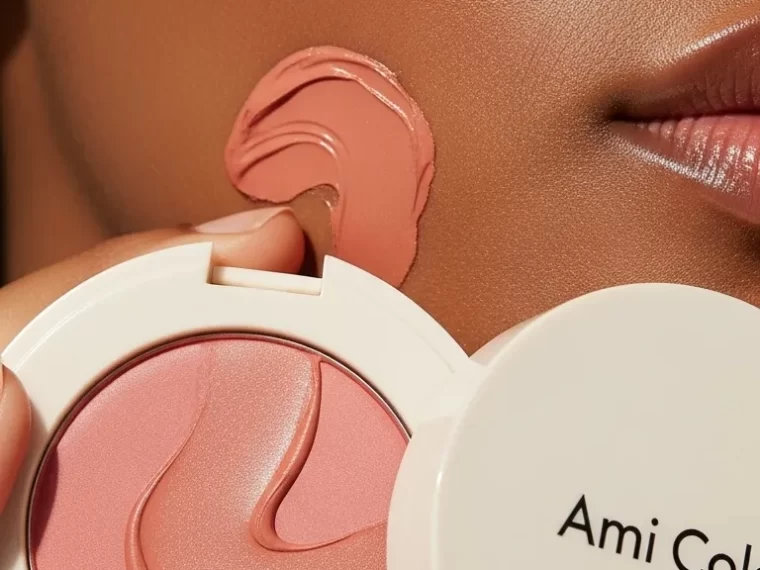
38. Ami Colé Desert Date Cream Blush

This blush is designed to give a radiant, skin-loving flush. The warm, rosy-terracotta shade is rich and beautiful. It comes in a chic, minimalist compact. The formula has a balmy, creamy texture that feels hydrating and melts upon touch.
It delivers a sheer, buildable wash of color. The finish is satin and luminous, giving a healthy glow that looks like your own skin, but better. This is a brilliant choice for a natural, effortless look, especially on deeper skin tones.
DIY Application Steps:
- Swirl to Warm: Use your fingertip to swirl in the pan. You’ll feel the balmy texture start to melt slightly.
- Pick Up the Color: Get a nice, even layer of blush on your fingertip.
- Smile and Find Your Spot: Give a soft smile and find the plumpest part of your cheeks.
- Pat and Press: Gently pat and press the color onto your cheeks. The warmth of your skin and finger will help it blend.
- Build the Glow: Add another layer by patting on more product if you want a more noticeable, radiant flush.
Switching to a cream blush is one of the easiest ways to update your look for fall and embrace a more radiant, healthy complexion. From sheer balms to pigmented liquids, there truly is a formula for everyone.
Don’t be afraid to use your fingers to apply these products. The warmth from your skin helps them melt for a seamless finish. Whether you want a subtle tint or a bold pop of color, the key is to start small and blend well. With these 38 options, you are sure to find a new favorite to carry you through the season and beyond.
Key Takeaways
- Natural Finish: Cream blushes excel at creating a natural, skin-like flush that looks more believable than powder.
- Fingers are Your Friends: Applying with clean fingers warms the product, helping it melt into the skin for a seamless blend.
- A Little Goes a Long Way: Most cream and liquid blushes are highly pigmented. Always start with a tiny amount and build up the color gradually.
- Versatility is Key: Many of these products are multi-use, perfect for creating a quick and cohesive look on cheeks, lips, and sometimes even eyes.
- Find Your Formula: Whether you have oily, dry, or combination skin, there is a cream blush formula—from dewy and balmy to satin and matte—that will work for you.